# Multi-Currency Testing
## Introduction
Intelligems price tests run in your store's default currency by default. However, Intelligems supports price testing in any Shopify-supported currency. Each currency you want to test will require its own separate test configuration in the Intelligems app.
## **Prerequisites**
* [ ] You are **either:**
* [ ] Using Shopify Plus and have the [Script Editor App](https://help.shopify.com/en/manual/checkout-settings/script-editor) installed
* [ ] Using any Shopify plan and are able to use [Shopify Cart Transform Functions](https://shopify.dev/docs/api/functions/reference/cart-transform). This typically requires being upgraded to Checkout Extensibility, and is not compatible with a few apps, such as subscription apps
* [ ] You are on the [Intelligems Blue plan](https://www.intelligems.io/pricing?type=Annual\&priceRange=0-2500)
* [ ] An Intelligems team member has enabled the Multi-Currency Testing feature for you. Reach out to support [here](https://portal.usepylon.com/intelligems/forms/intelligems-support-request) if you are not sure if this feature has been enabled for you yet
* [ ] You must be familiar with and using [Shopify Markets](https://www.shopify.com/markets) or [Global-e](https://www.shopify.com/markets) for localization
* [ ] You are ready to upload prices to your desired market when you [start](#starting-a-test), [pause](#ending-or-pausing-a-test) or [end](#ending-or-pausing-a-test) your price test
* [ ] You have a fixed price set in the desired currency for each variant you plan to test
## **Step 1:** Set up test in the Intelligems app
Creating a multi-currency test is generally similar to any other Price Test, with a few key changes to note. If you are not familiar with setting up a Price Test, please see our article [here](https://docs.intelligems.io/price-testing/how-to-set-up-a-price-test).
The main differences in setting up a Price Test that is not in your default currency are:
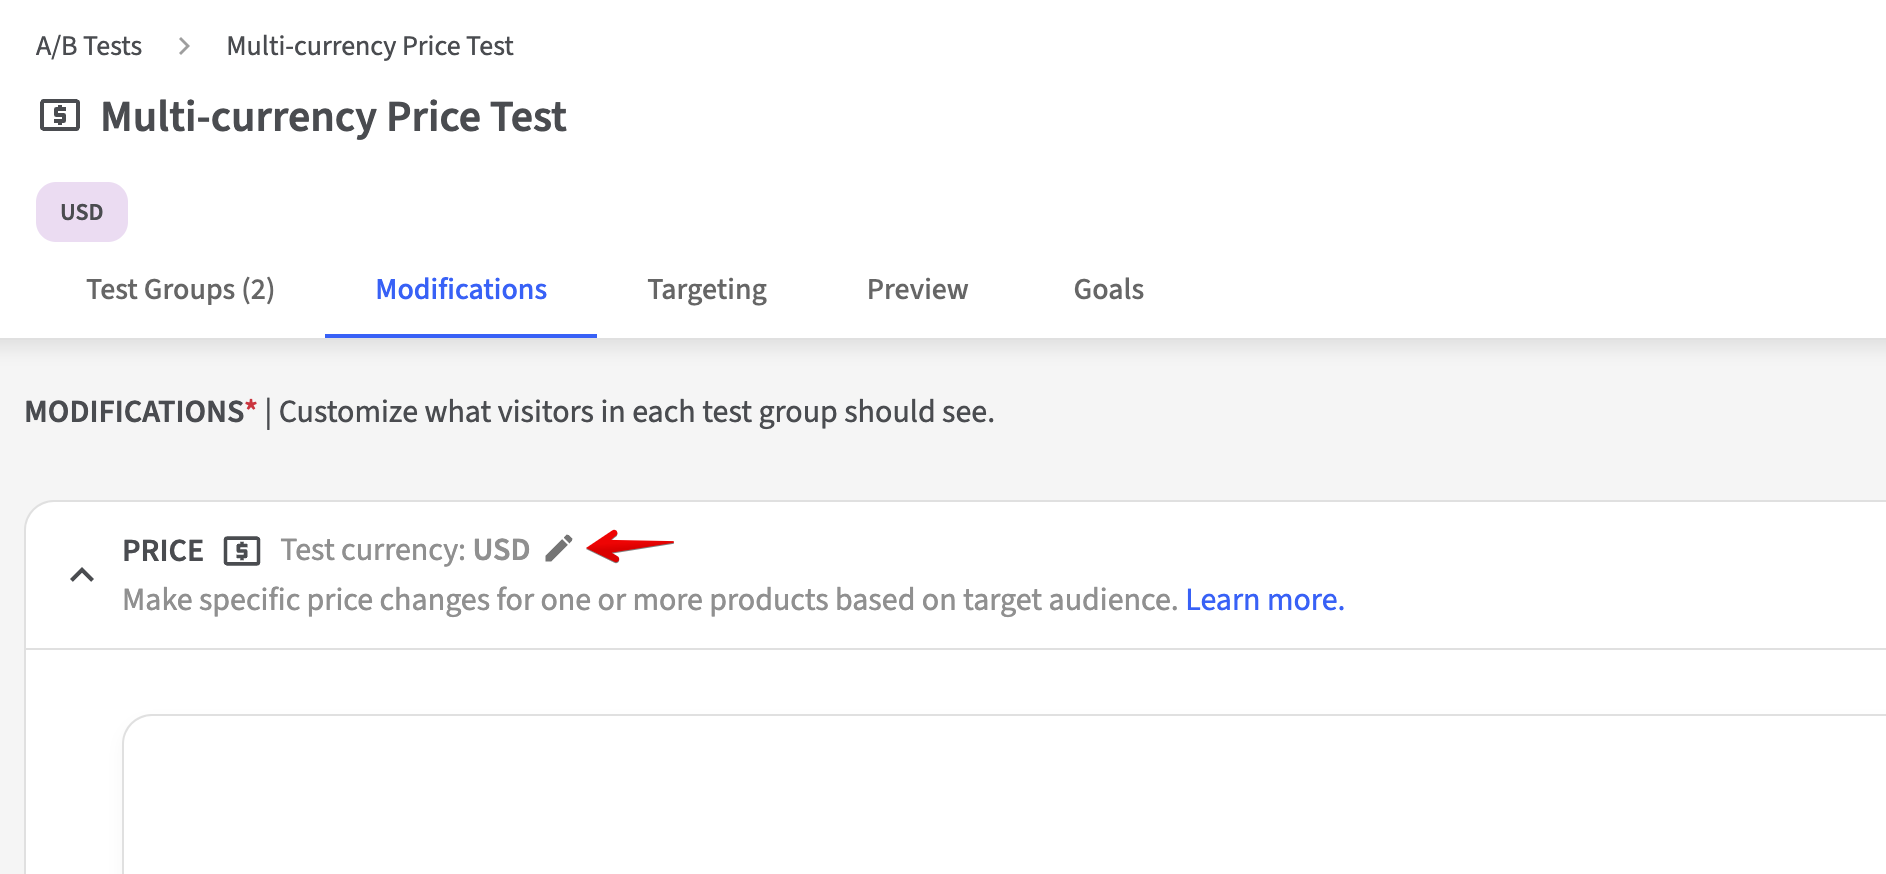
1. Once you've added your test product(s) in the Modifications tab, you will need to update the currency to match your desired test currency as shown in the screenshot below:
{% hint style="warning" %}
This option will not be available until an Intelligems team member has enabled the multi-currency setting for you.
{% endhint %}
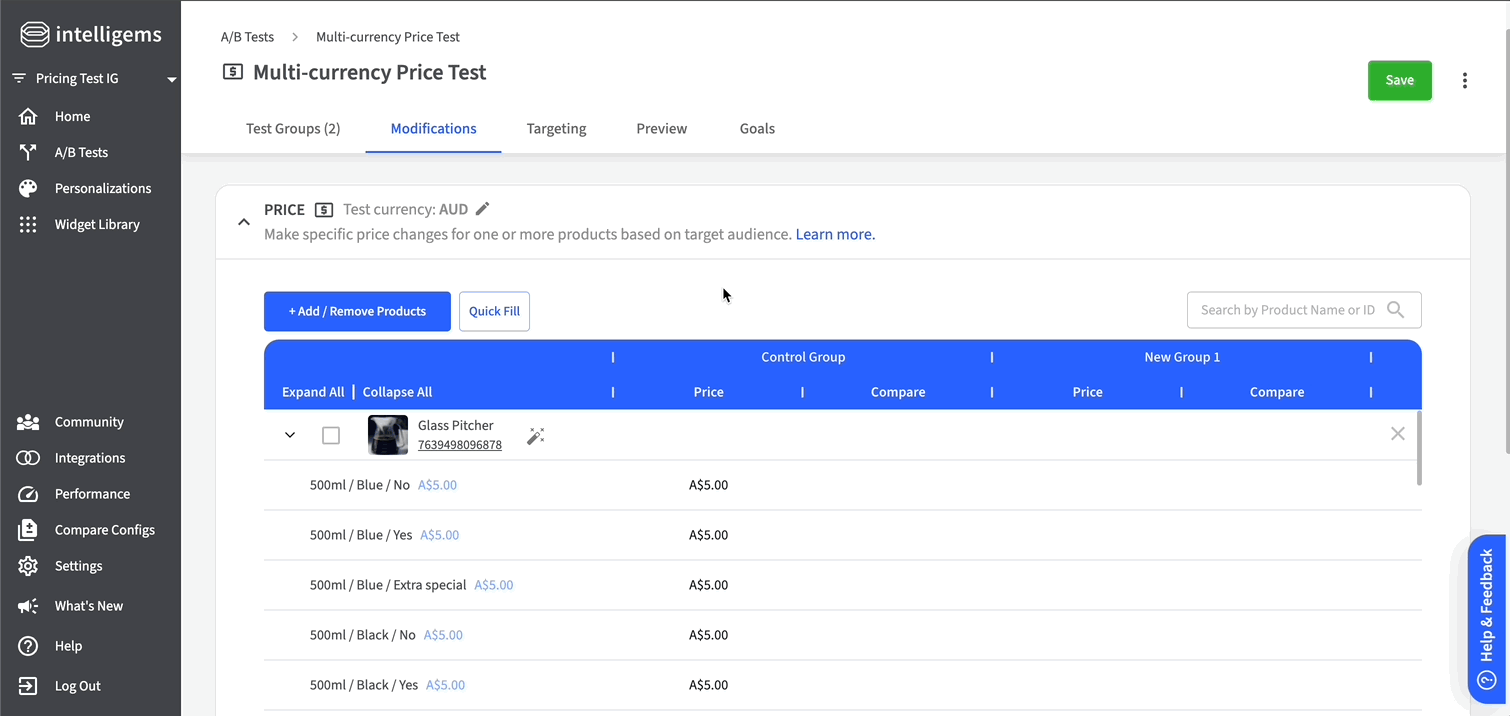
2. You will need to update control prices to match your test currency prices. Prices aren't automatically converted, so verify each cell displays the correct amount.
{% hint style="warning" %}
Quick filling test groups based on control prices is not available for multi-currency tests. While you'll see the Quick Fill option in the app, clicking on it will take you directly to the 'Fill by Upload' option.
{% endhint %}
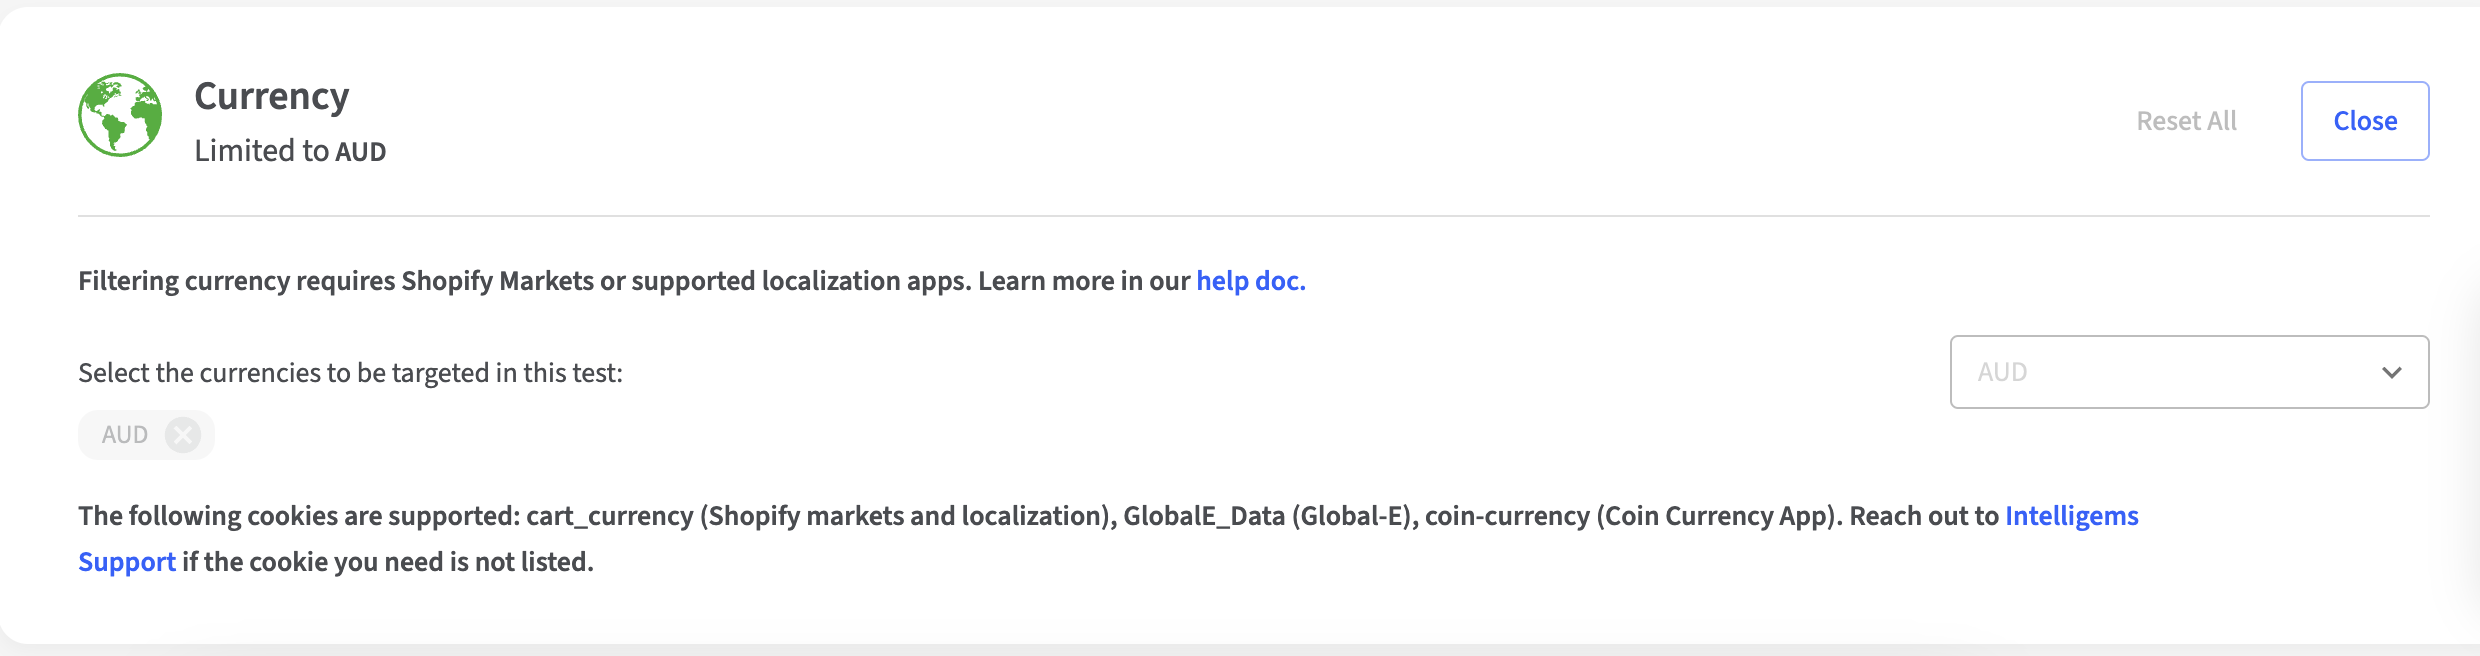
3. Currency targeting is set to your selected test currency by default, and will not be editable directly in the targeting section.
## **Step 2: QA your Test**
This will be generally the same as QAing any other Price Test. You can see our checklist for QAing a Price Test [here](https://docs.intelligems.io/price-testing/price-test-qa-checklist). Please also keep in mind that your store's selected currency must match the test's currency.
## **Step 3: Starting a Test**
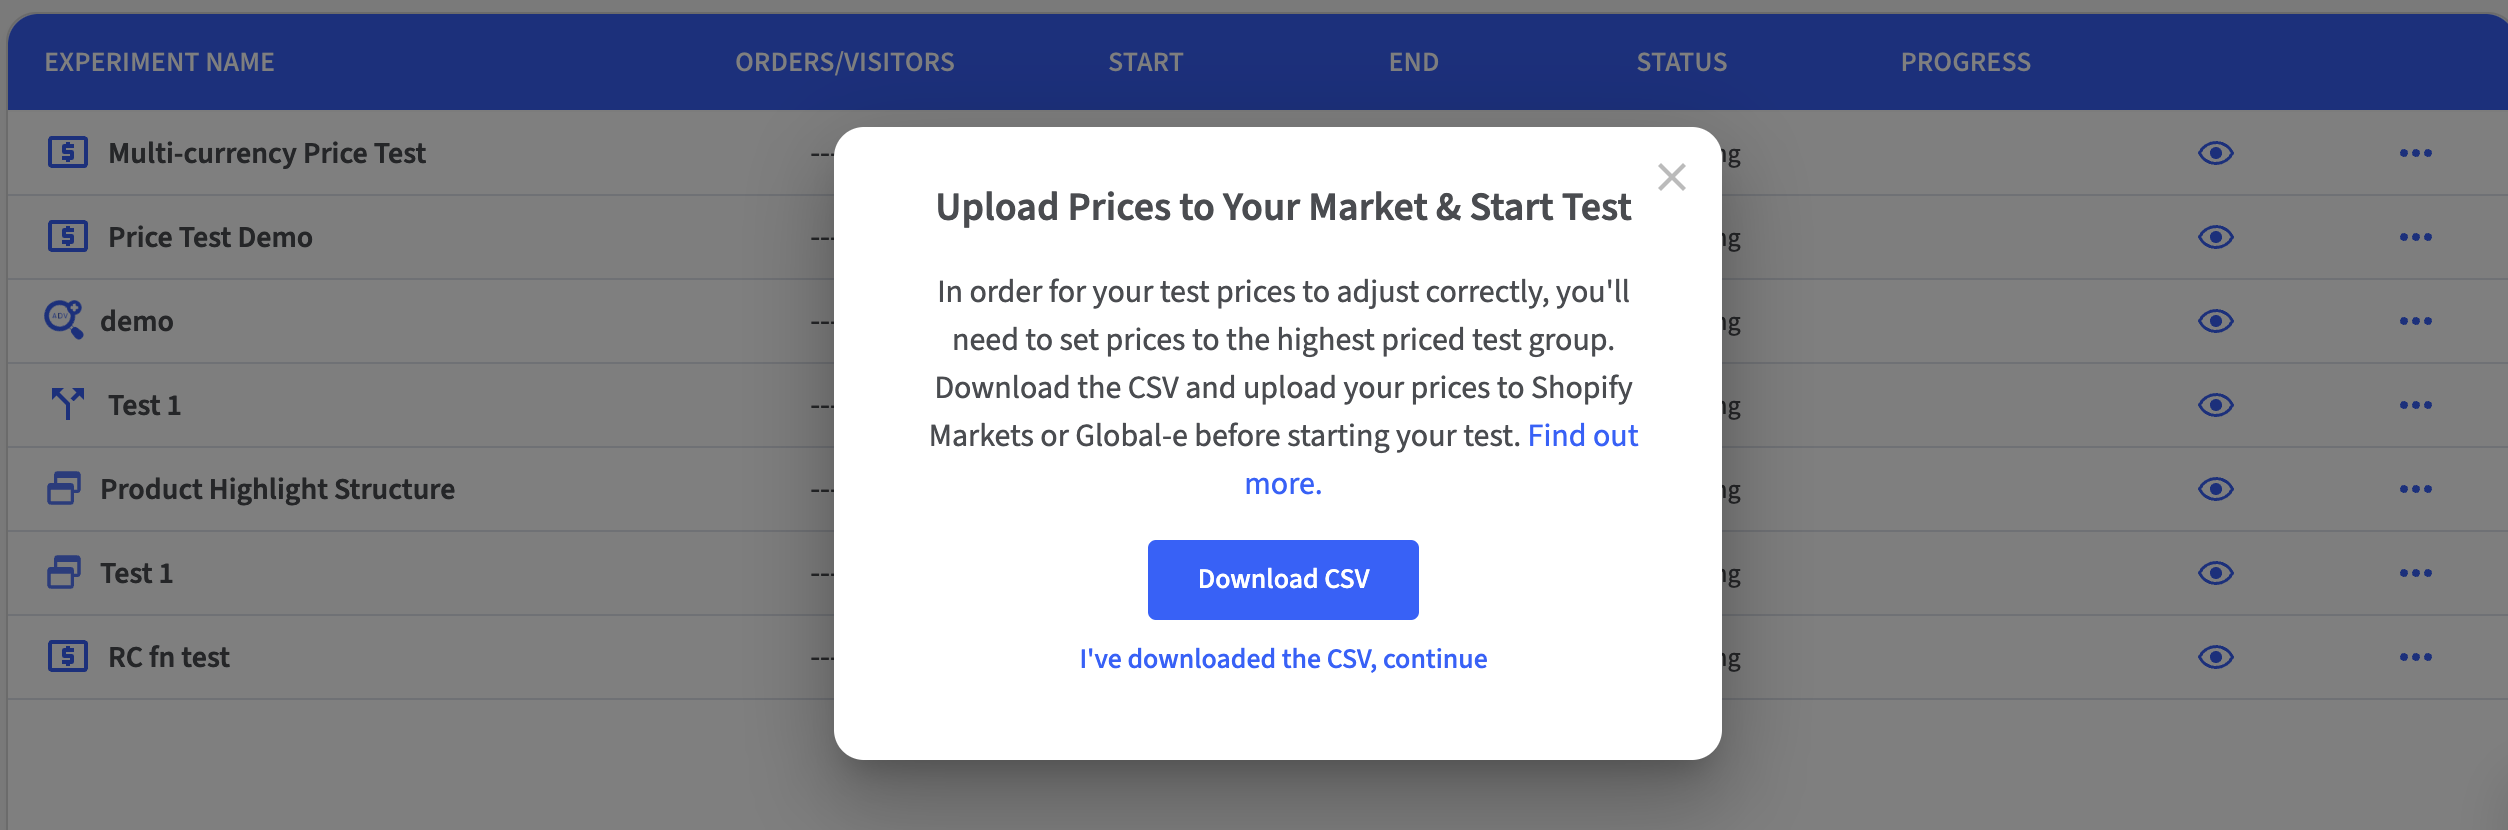
Your prices need to be set to the highest-priced test group in order for the test to run properly. When you hit the play button for your test, Intelligems will prompt you to download a price CSV that you'll use to update the prices in [Global-e](https://www.shopify.com/markets) or [Shopify Markets](https://www.shopify.com/markets) to the highest prices in your test.
Once you have this CSV, you should:
**If you are using Global-e:**
Reach out to your account manager at Global-e with this CSV. They will help you upload this information.
**If you are using Shopify Markets:**
1. Export Your Products:
1. From your Shopify admin, go to Products.
2. Export your products, making sure to include catalog pricing, international pricing, and variants. If you are able to set up any filters in Shopify to limit the export to products you will be price testing, this will make the next steps easier.
2. Edit Prices in a Spreadsheet:
1. Use the "Variant SKU" column in the Shopify export and the "sku" column in the Intelligems export to match your products.
2. Add the prices and compare prices in the Intelligems export to the appropriate Market columns in the Shopify export. There should be one column for the price and one column for the compare price for each Market you have set up in Shopify Markets - ensure you merge the prices from Intelligems in the correct columns.
3. Import Your Changes:
1. Save your updated spreadsheet file. From your Shopify admin, go to Products.
2. Import the file back into your Shopify admin, using the same app or the built-in import tool. The system will analyze your changes and update your products accordingly.
{% hint style="info" %}
You cannot have a product in more than one experiment *if* the experiments are set to the same currency. If so, the test will not start.
{% endhint %}
## **Step 4: Pausing or Ending a Test**
When pausing or ending a test, you'll be prompted to download a CSV with the prices that you want to roll out either while the test is paused, or permanently. You'll need to upload the file with the new prices either to [Shopify Markets](https://www.shopify.com/markets) or [Global-e](https://www.shopify.com/markets).
Once you have this CSV, you should:
**If you are using Global-e:**
Reach out to your account manager at Global-e with this CSV. They will help you upload this information.
**If you are using Shopify Markets:**
1. Export Your Products:
1. From your Shopify admin, go to Products.
2. Export your products, making sure to include catalog pricing, international pricing, and variants. If you are able to set up any filters in Shopify to limit the export to products that were price tested, this will make the next steps easier.
2. Edit Prices in a Spreadsheet:
1. Use the "Variant SKU" column in the Shopify export and the "sku" column in the Intelligems export to match your products.
2. Add the prices and compare prices in the Intelligems export to the appropriate Market columns in the Shopify export. There should be one column for the price and one column for the compare price for each Market you have set up in Shopify Markets - ensure you merge the prices from Intelligems in the correct columns.
3. Import Your Changes:
1. Save your updated spreadsheet file. From your Shopify admin, go to Products.
2. Import the file back into your Shopify admin. The system will analyze your changes and update your products accordingly.
 {% endhint %}
3. Currency targeting is set to your selected test currency by default, and will not be editable directly in the targeting section.
{% endhint %}
3. Currency targeting is set to your selected test currency by default, and will not be editable directly in the targeting section.